 iSmartNetwork Magazine The online magazine for you…
Knowing how to draw a face and head accurately and realistically is key to developing effective attributes. When it comes to drawing heads , nothing is set in stone; different characters have vastly different aspects. However, a basic understanding of how to draw and a grounding in psyche anatomy will enable you to experiment confidently, and these skills will certainly improve your drawings.
On this page I’ll prove you how to draw a face, moving from initial draws to using citations, and sharing my personal techniques. Once you& apos; ve mastered that, flip to page two to learn how to further your knowledge. I’ll offer some advice on how to draw a face with personality and how to show different formulations. Right, grab a sketchbook or your Cintiq and let’s get cracking!
Click on the icon at the top-right of the image to enlarge it.
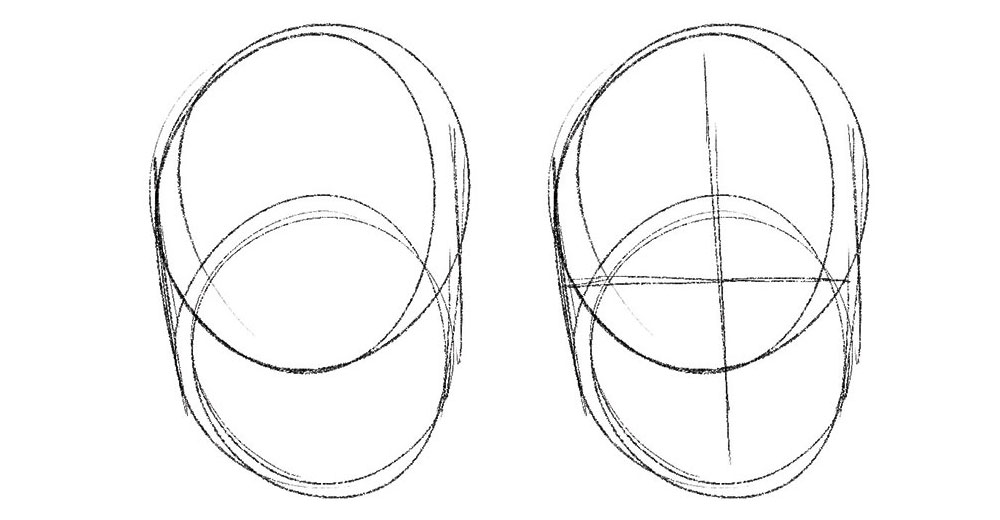
Two cliques is the foundation of the head
I start off by depict two overlapping circles. Where they intersect is the eye level. From there, threw a centre line down the two circles. This makes the basis of the human head.
02. Add construction pipelines
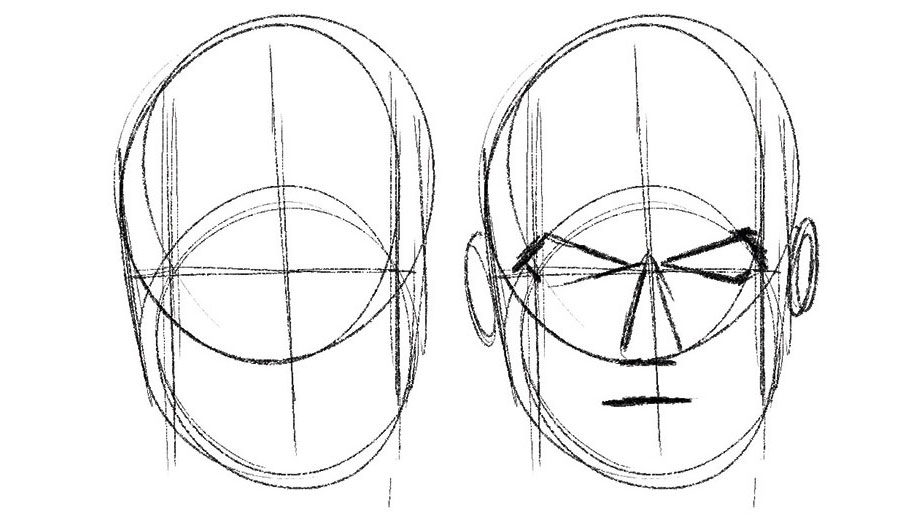
Use the guidelines to position the features
Draw two paths somewhat in from either back of your cliques. These is an indication of where the forehead and cheekbones sit. From the centre intersection, place a triangle for the snout and mark out where you want the mouth to go. Then add two triangles for the eyes- these will likewise are contributing to locate the eyebrows and eye sockets.
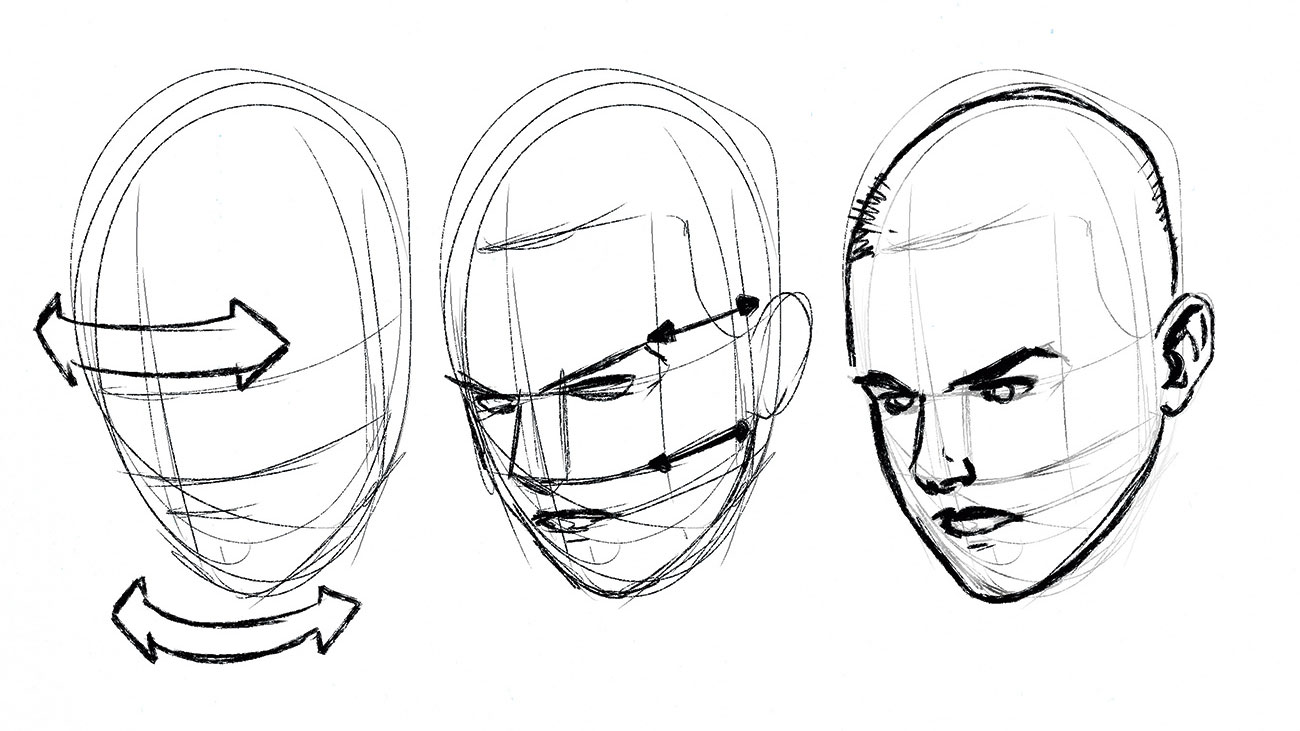
03. Explore different proportions

Different sized cliques will create different effects
You can experiment with different sized circles to give different brain dimensions. The more squashed the cliques, the wider and heavy the face, while the more elongated the cliques, the longer the psyche shape.
Imagine the features are wrap around a cylinder
Always be said that the eyes , snout and mouth disease are on the same aircraft on the face, otherwise things start to go a bit lopsided and weird! Imagine the facial aspects are wrapped around a cylinder, so they have a natural curve.
Position the top of the eyebrow and bottom of the nose so that they’re lined up with the height of the ear. This assistance the face seem most natural; dedicating it a pour, and stopping it from feeling flat.
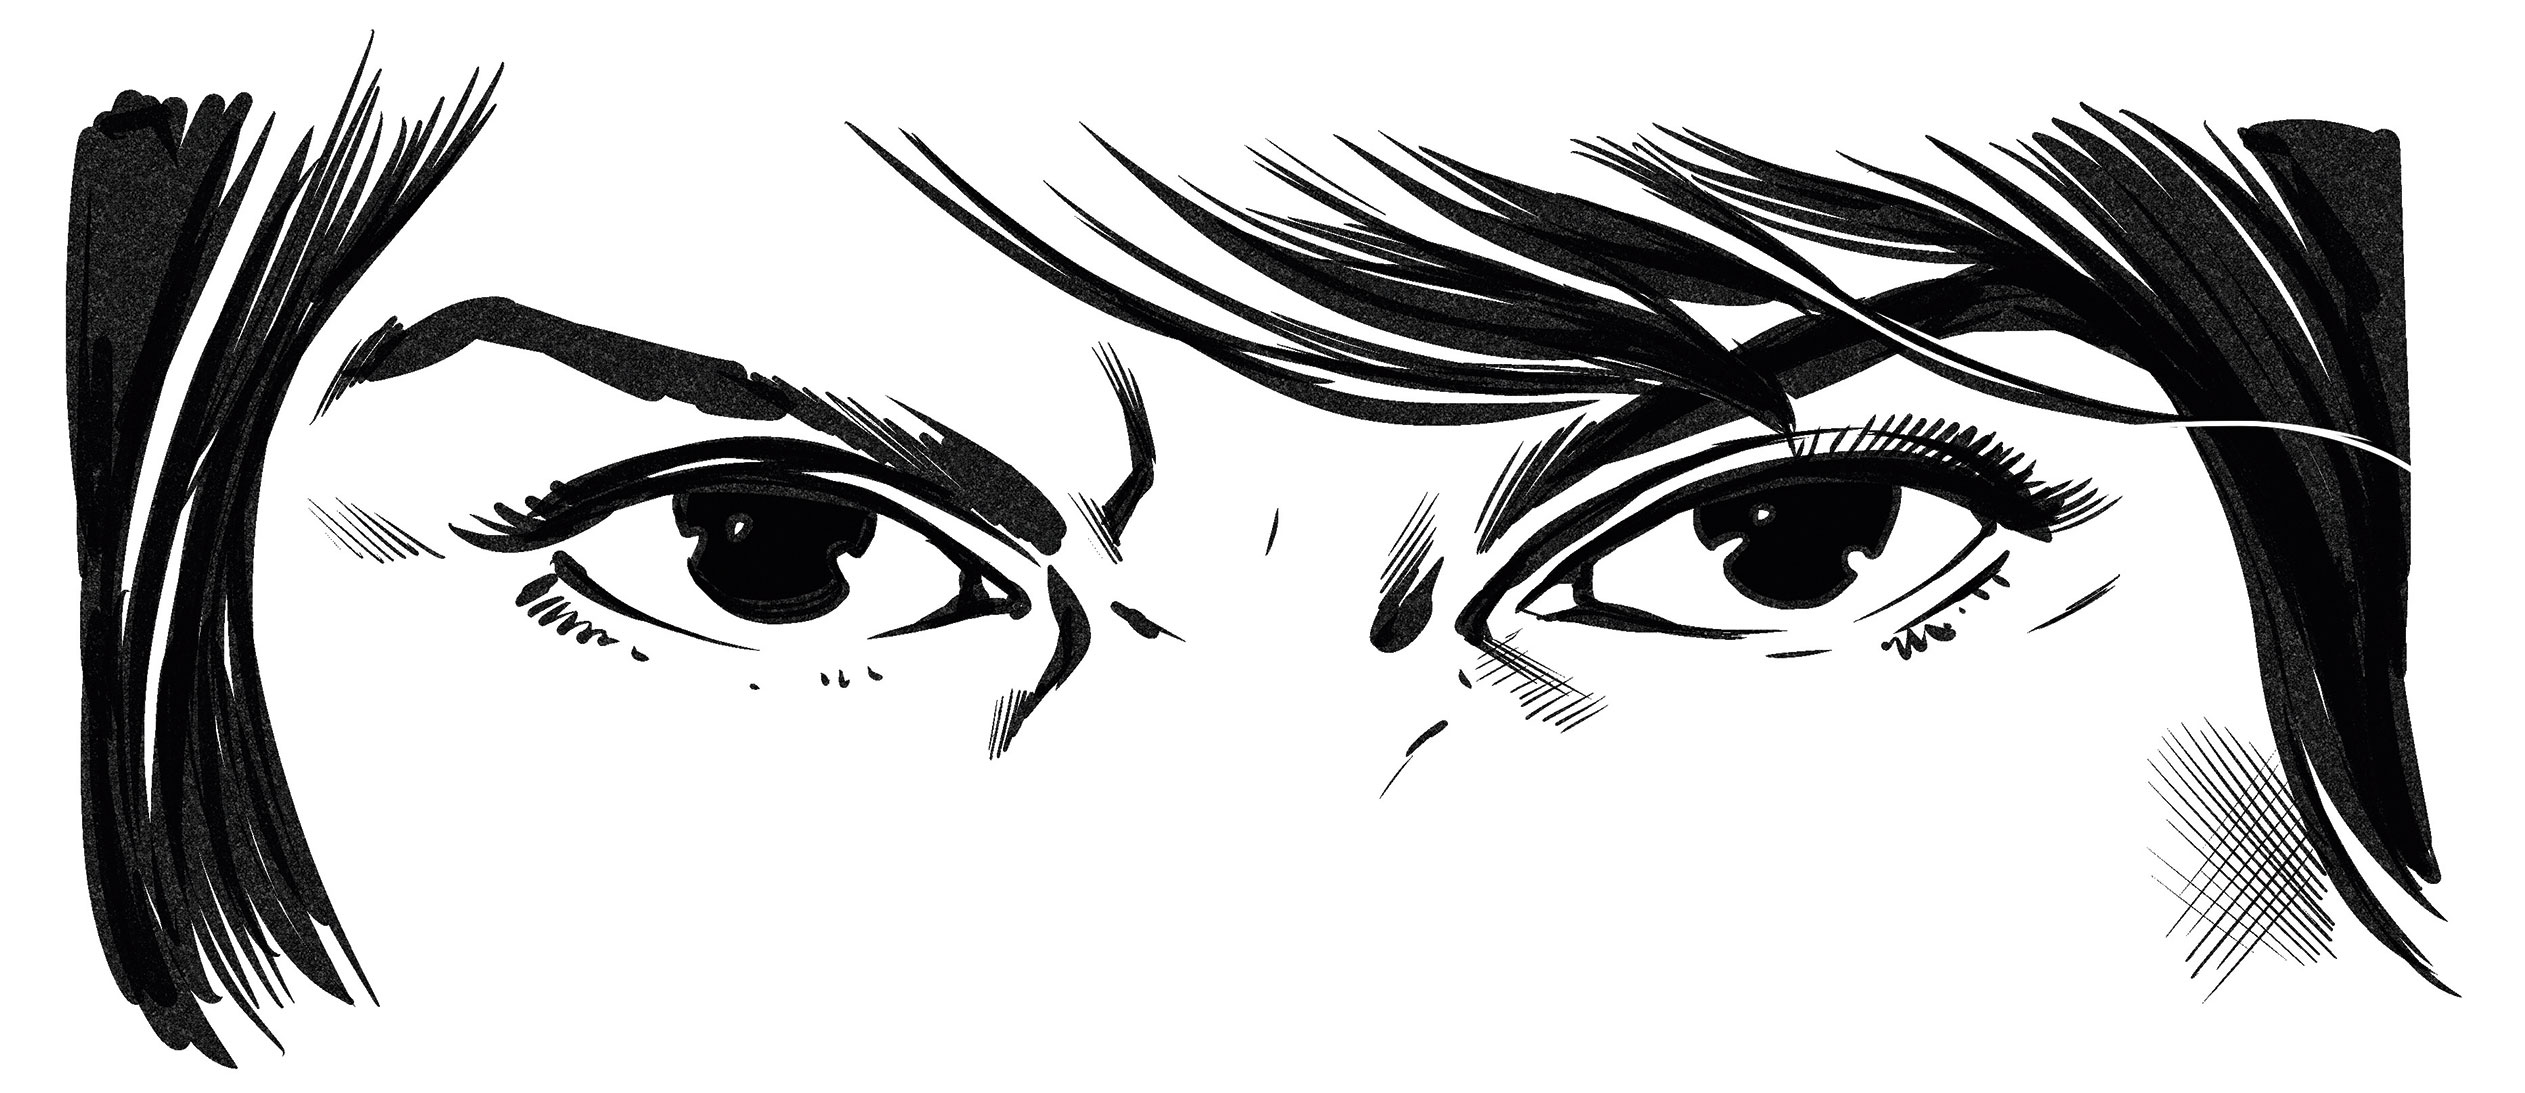
A light source assistances eyes looking more alive
Your character’s eyes are crucial to conveying the right excitement. Try to keep them focused and tell a story with them. Give the top eye a thicker line to indicate a shadow from the eyelid, and add a light source to give them life. Longer and thicker eyelashes create a more feminine look.
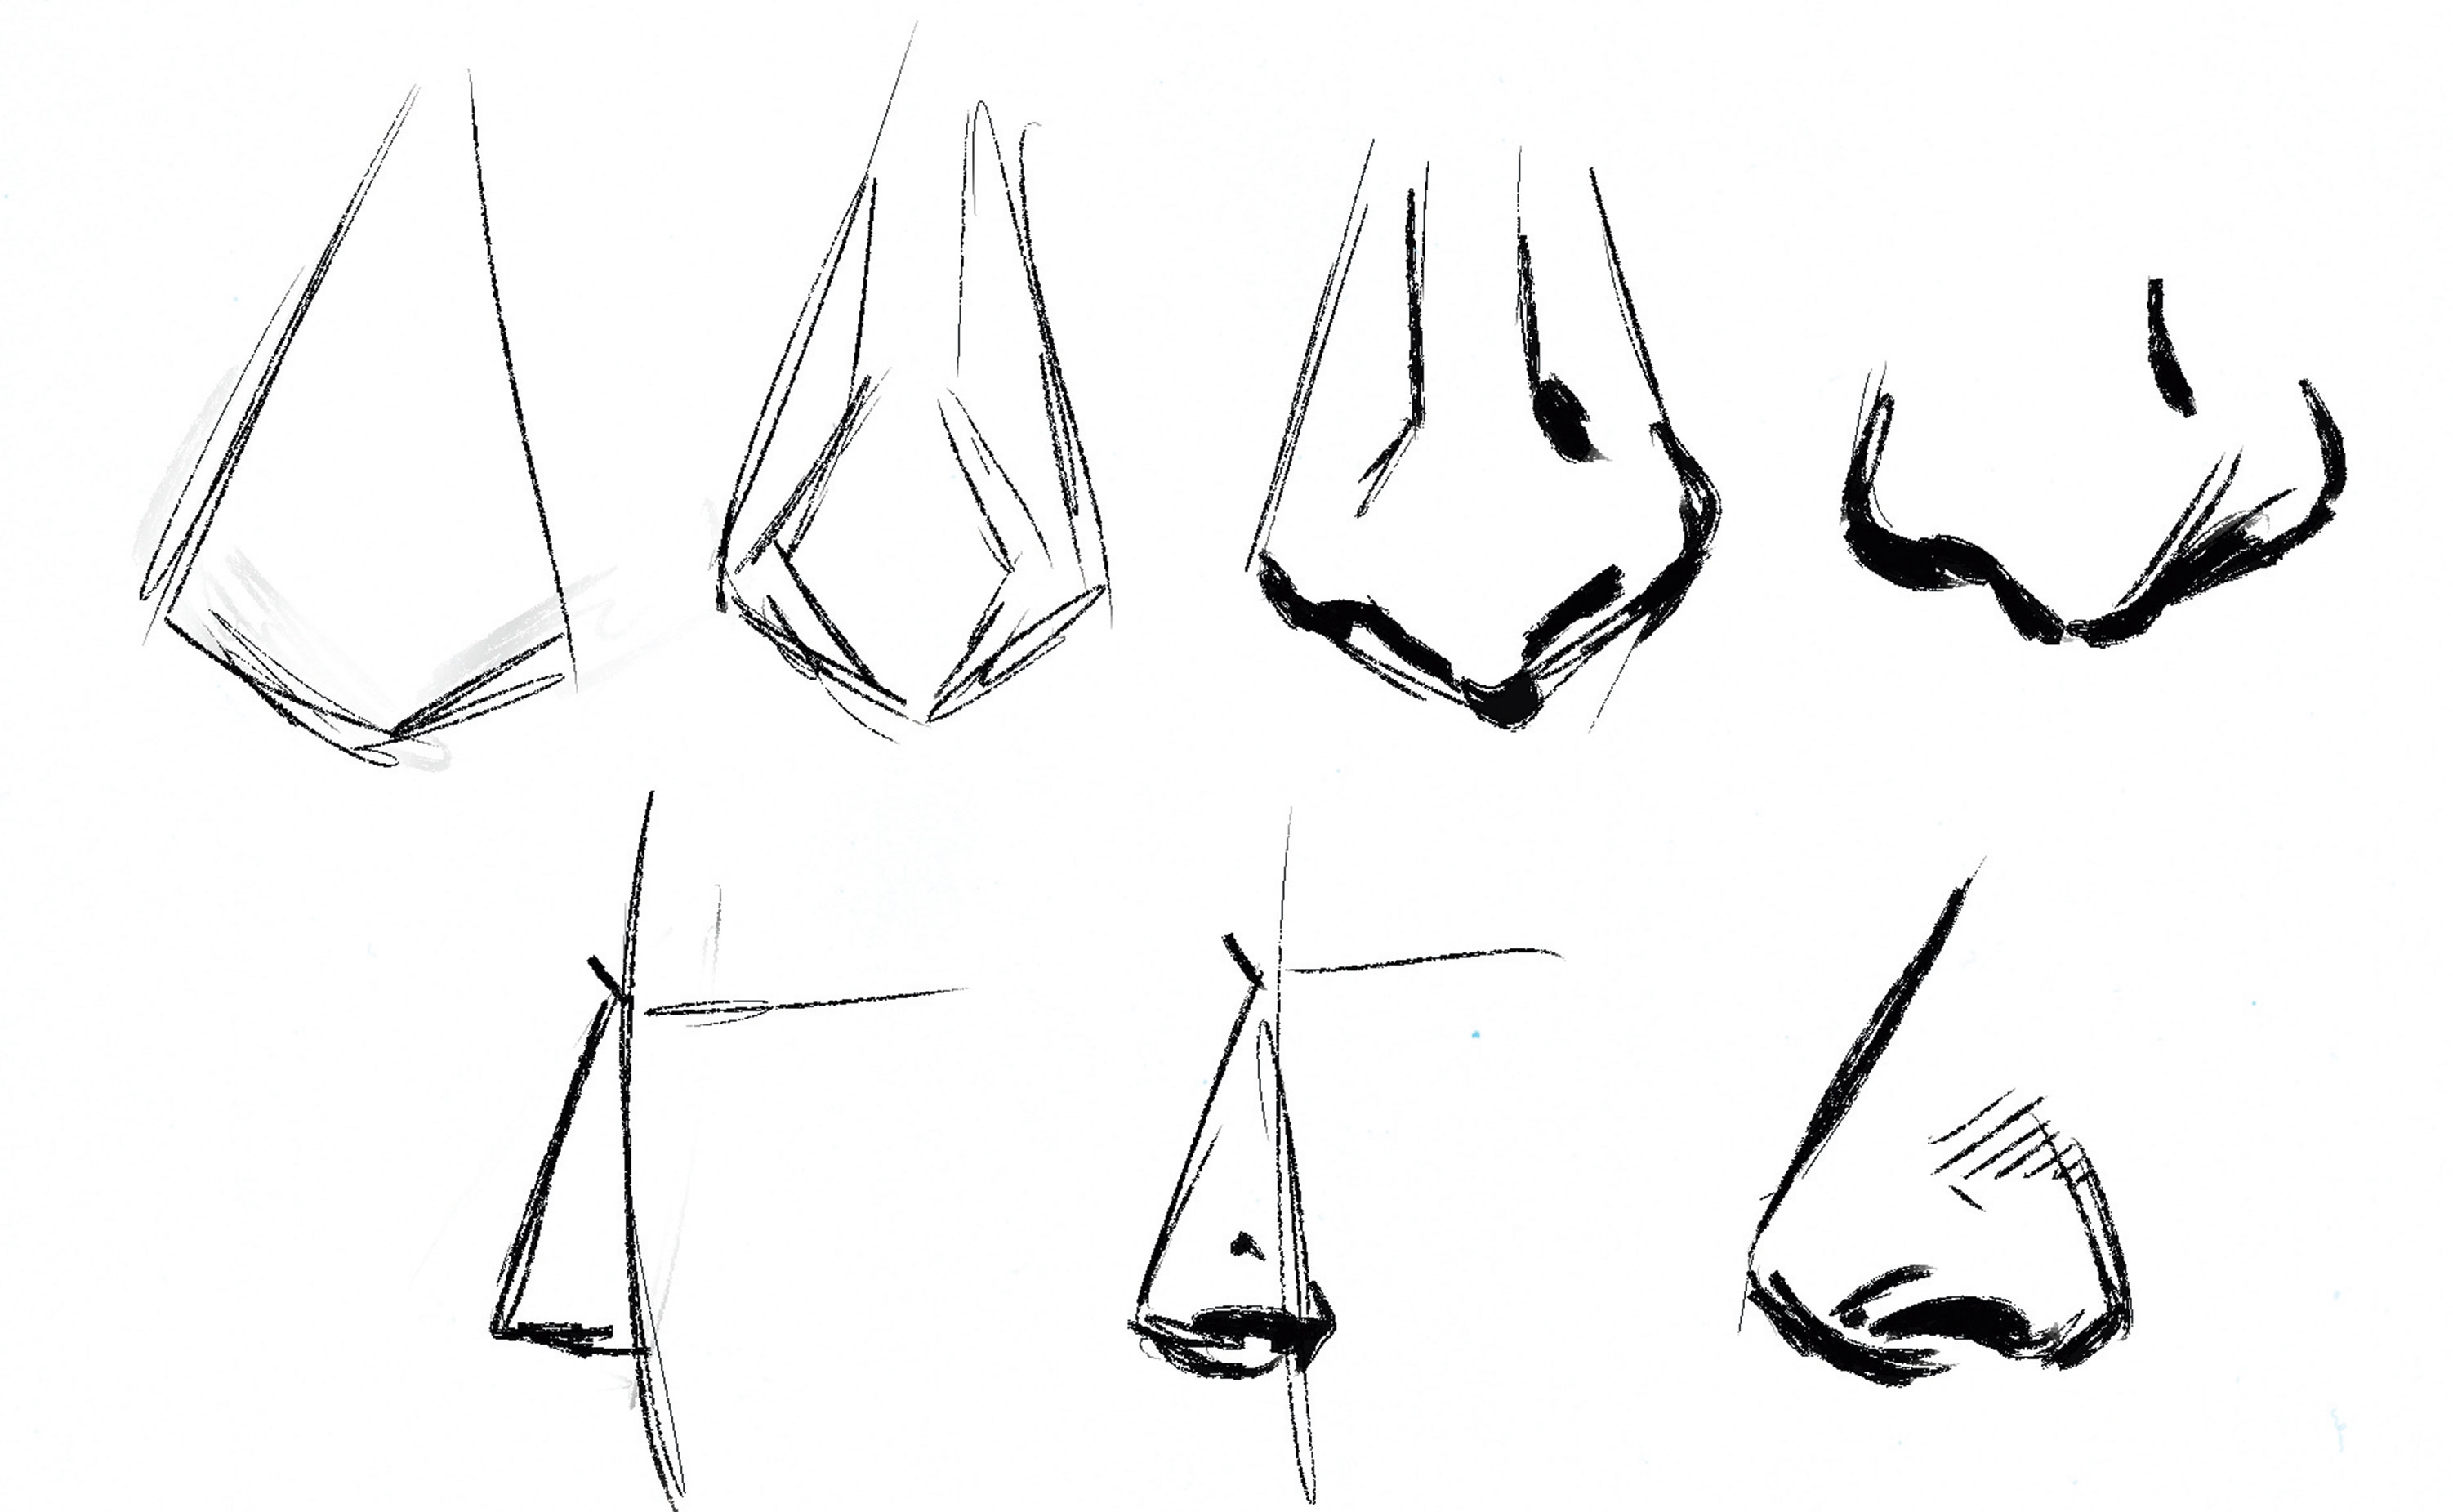
The tip of the snout is roughly diamond shaped
Noses can be pretty difficult to get right. I initially create a triangle with a diamond shape for the tip of the nose. From there I depict nostrils, recollecting to add line weight and darknes to the bottom of the nose. I keep the details light, adding only what’s needed.
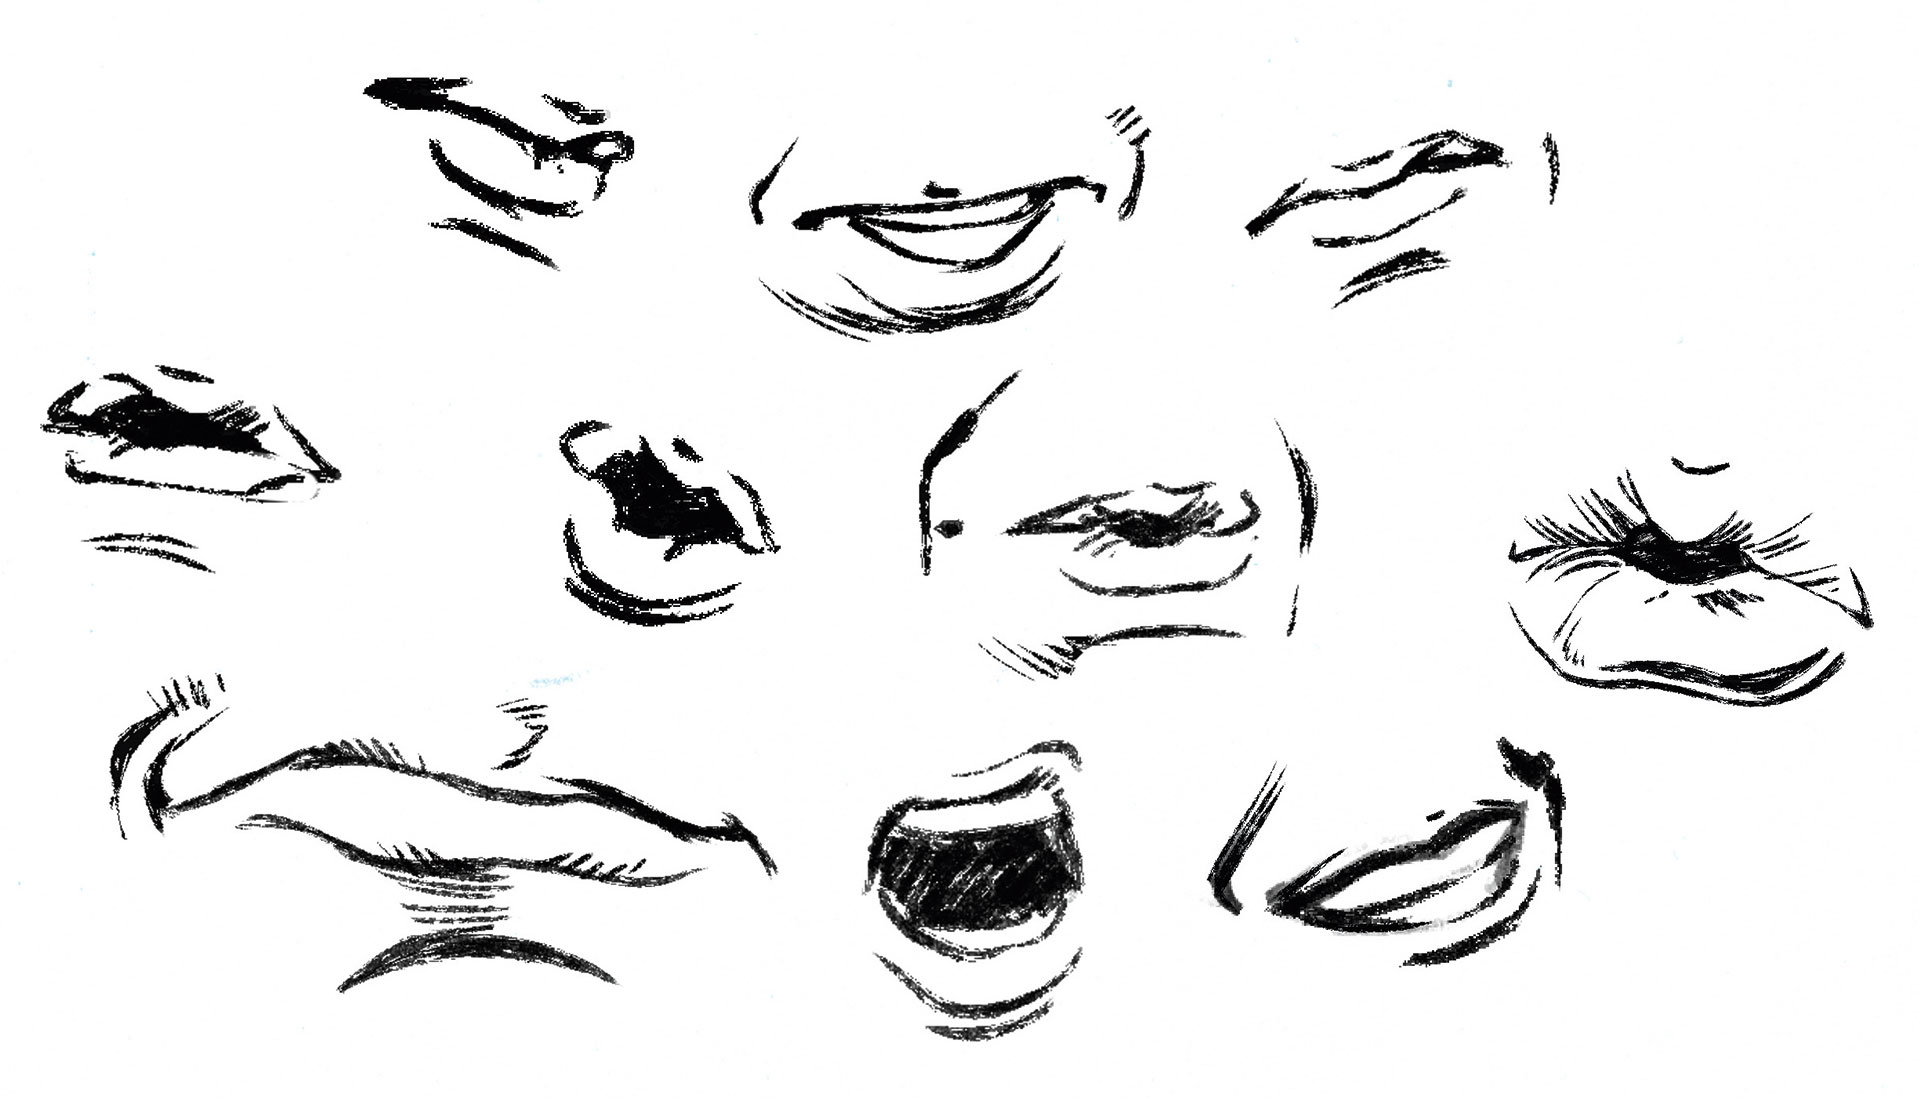
Look at your own mouth to explore different lip shapes
I keep a little sketchbook to practise different lip shapes. Study movies and Tv programmes to see how performers inflate their mouths. Experiment and explore different mouth shapes. Try to convey’ oh ‘,’ ah’ and’ esss ‘: this will help when you want figures to look like they’re having a conversation.
08. Consider differences between male and female faces
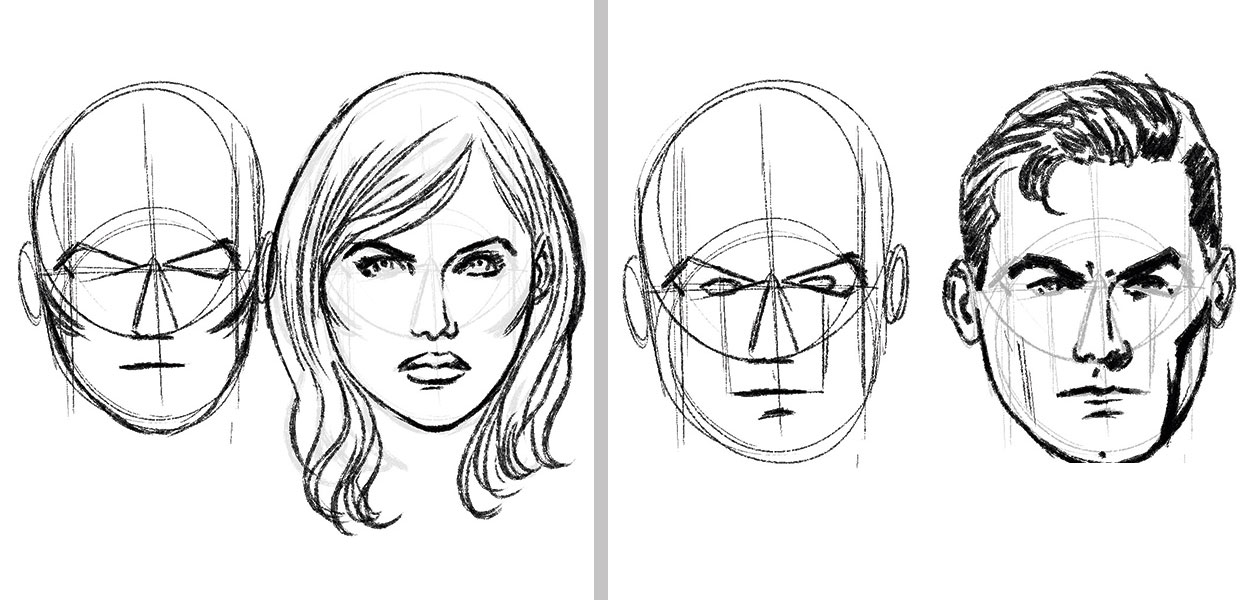
Male faces tend to be more angular- although this isn’t a hard and fast rule
The male face is a harder, angular shape. The female face is softer and rounder in general. For women, try to depict fuller lips, bigger eyes and rounder cheeks. These are not hard and fast rules, though- simply a guide.
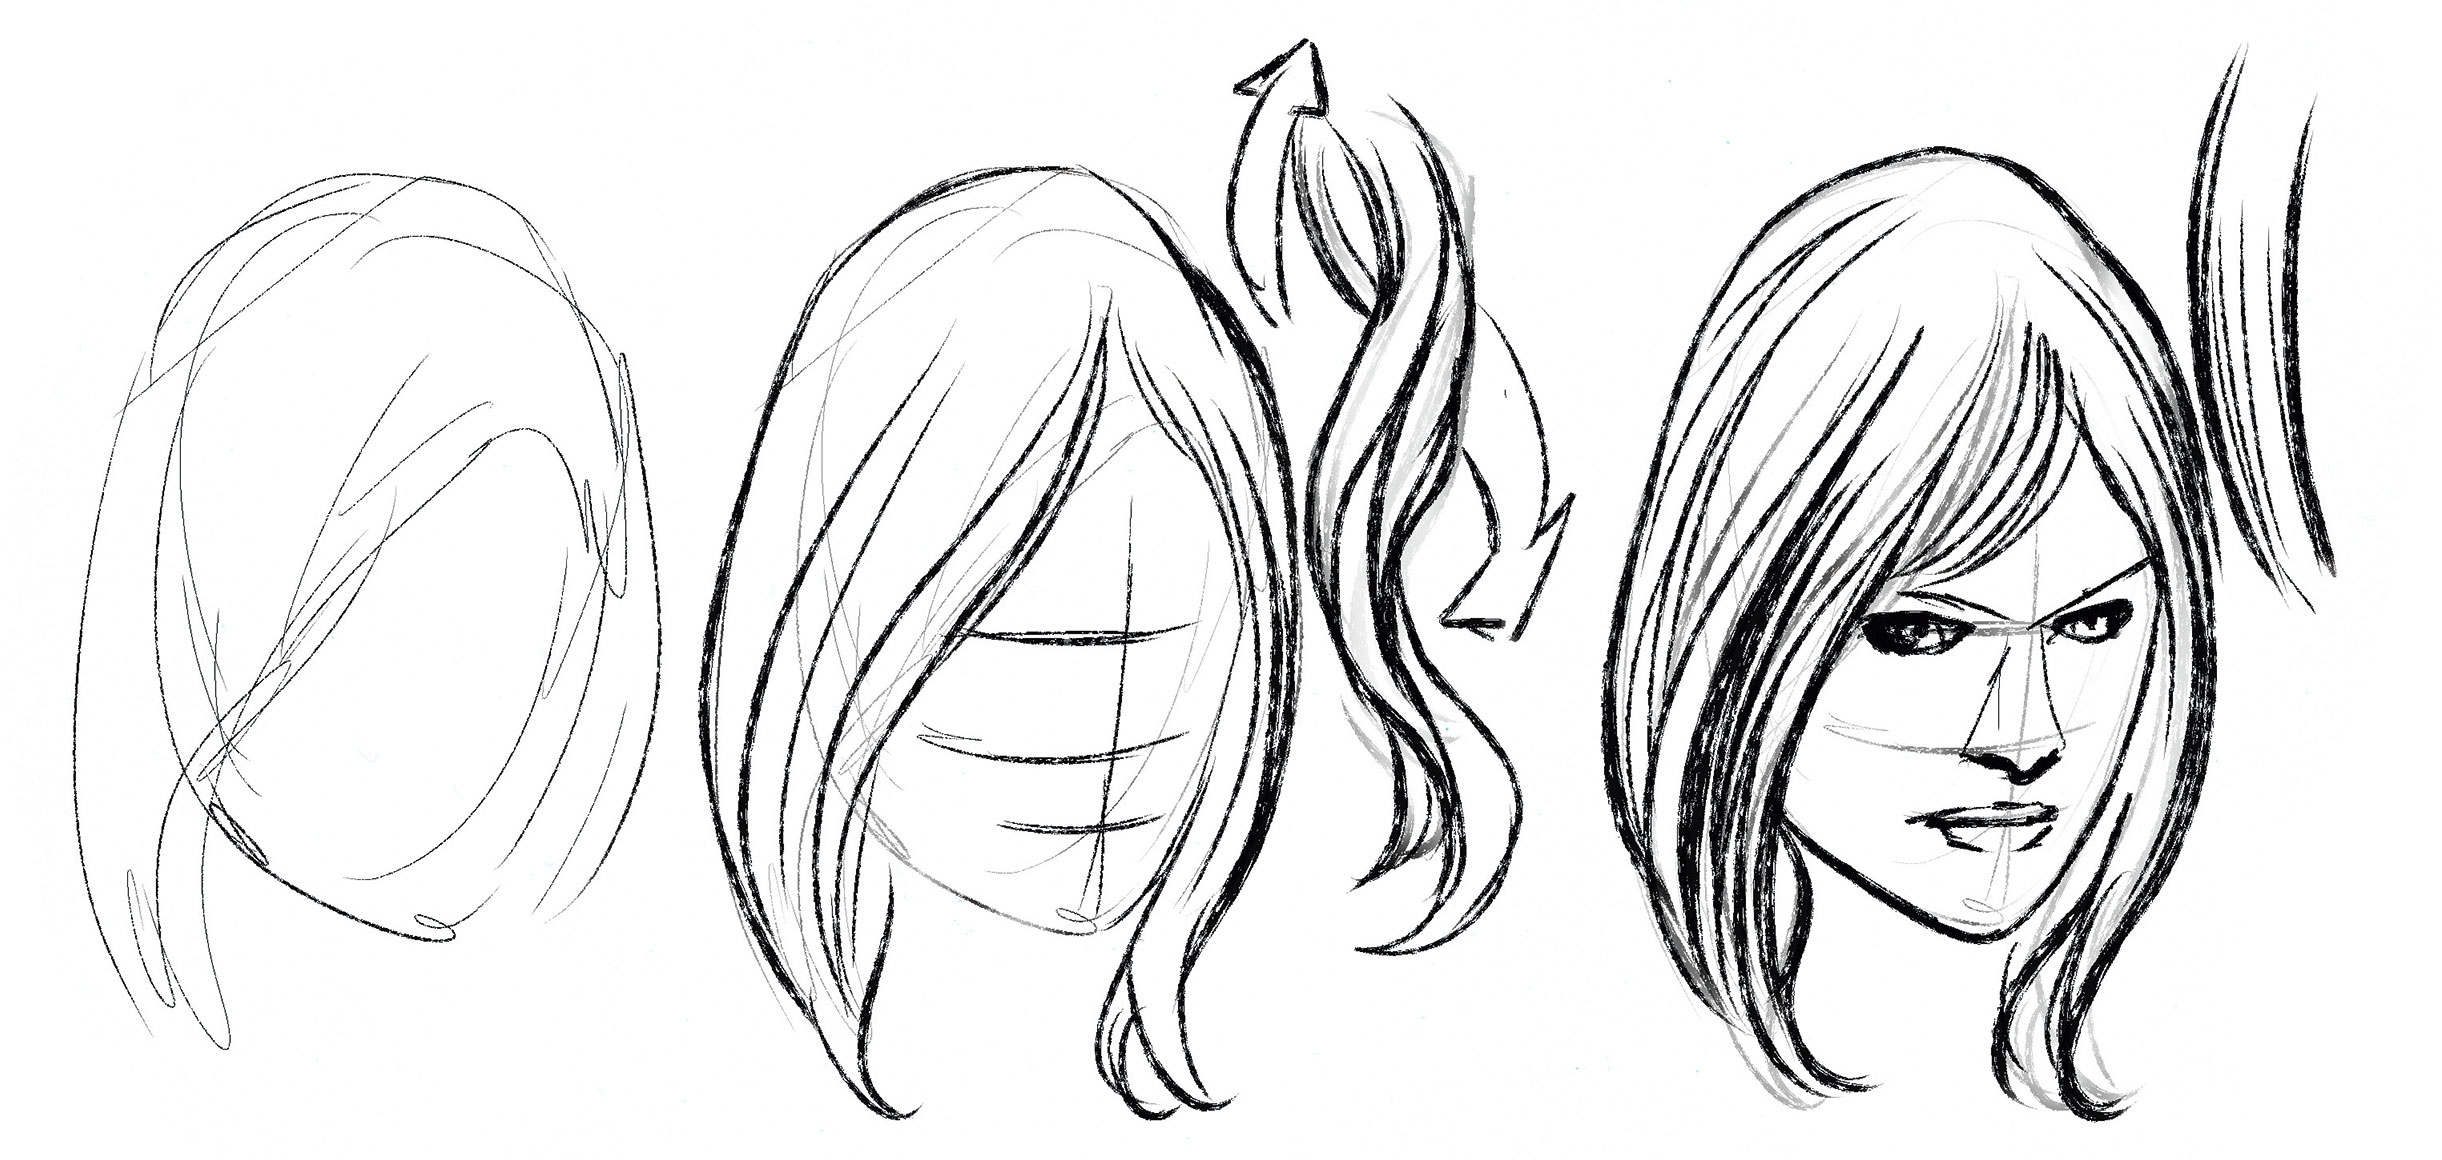
Remember, the fuzz is bigger than the scalp
When drawing a character’s mane, I firstly develop the basic mane shape , noting that the whisker is bigger than the scalp. I then add direction to the hair, recollecting to draw strokes from the crown of the chief. To devote hair a more natural appearance, I introduce a sense of weight to the bottom of the shape. Trying pull the whisker shape with a thicker drawing and thinner internal lines. This renders it direction.
Next page: well advanced techniques for drawing a face
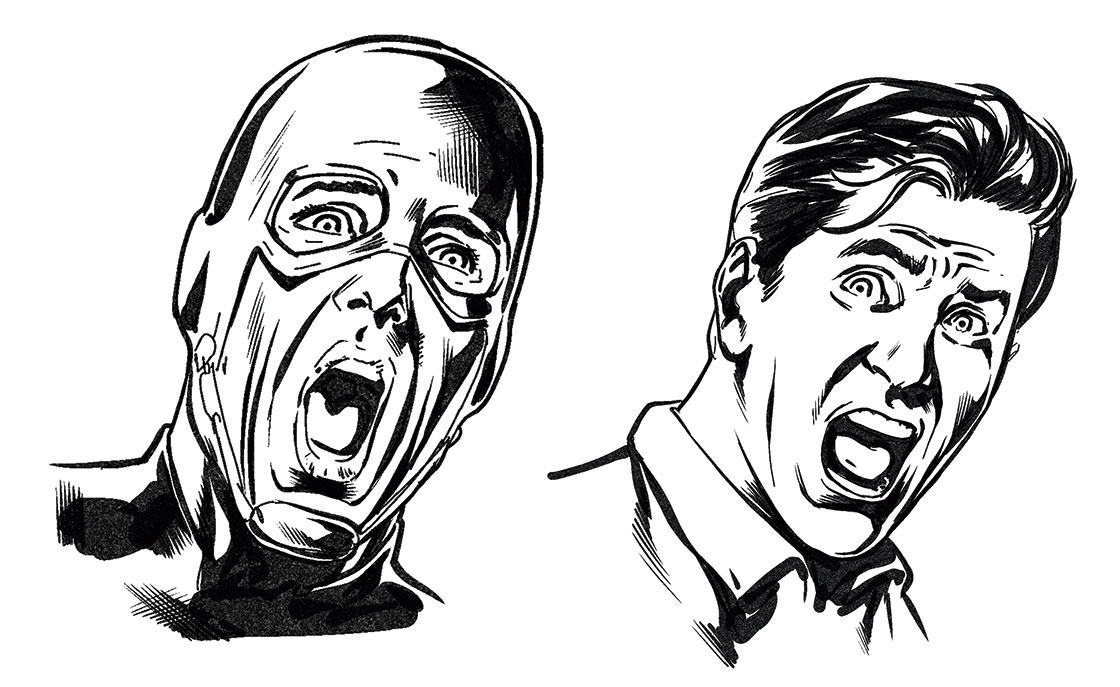
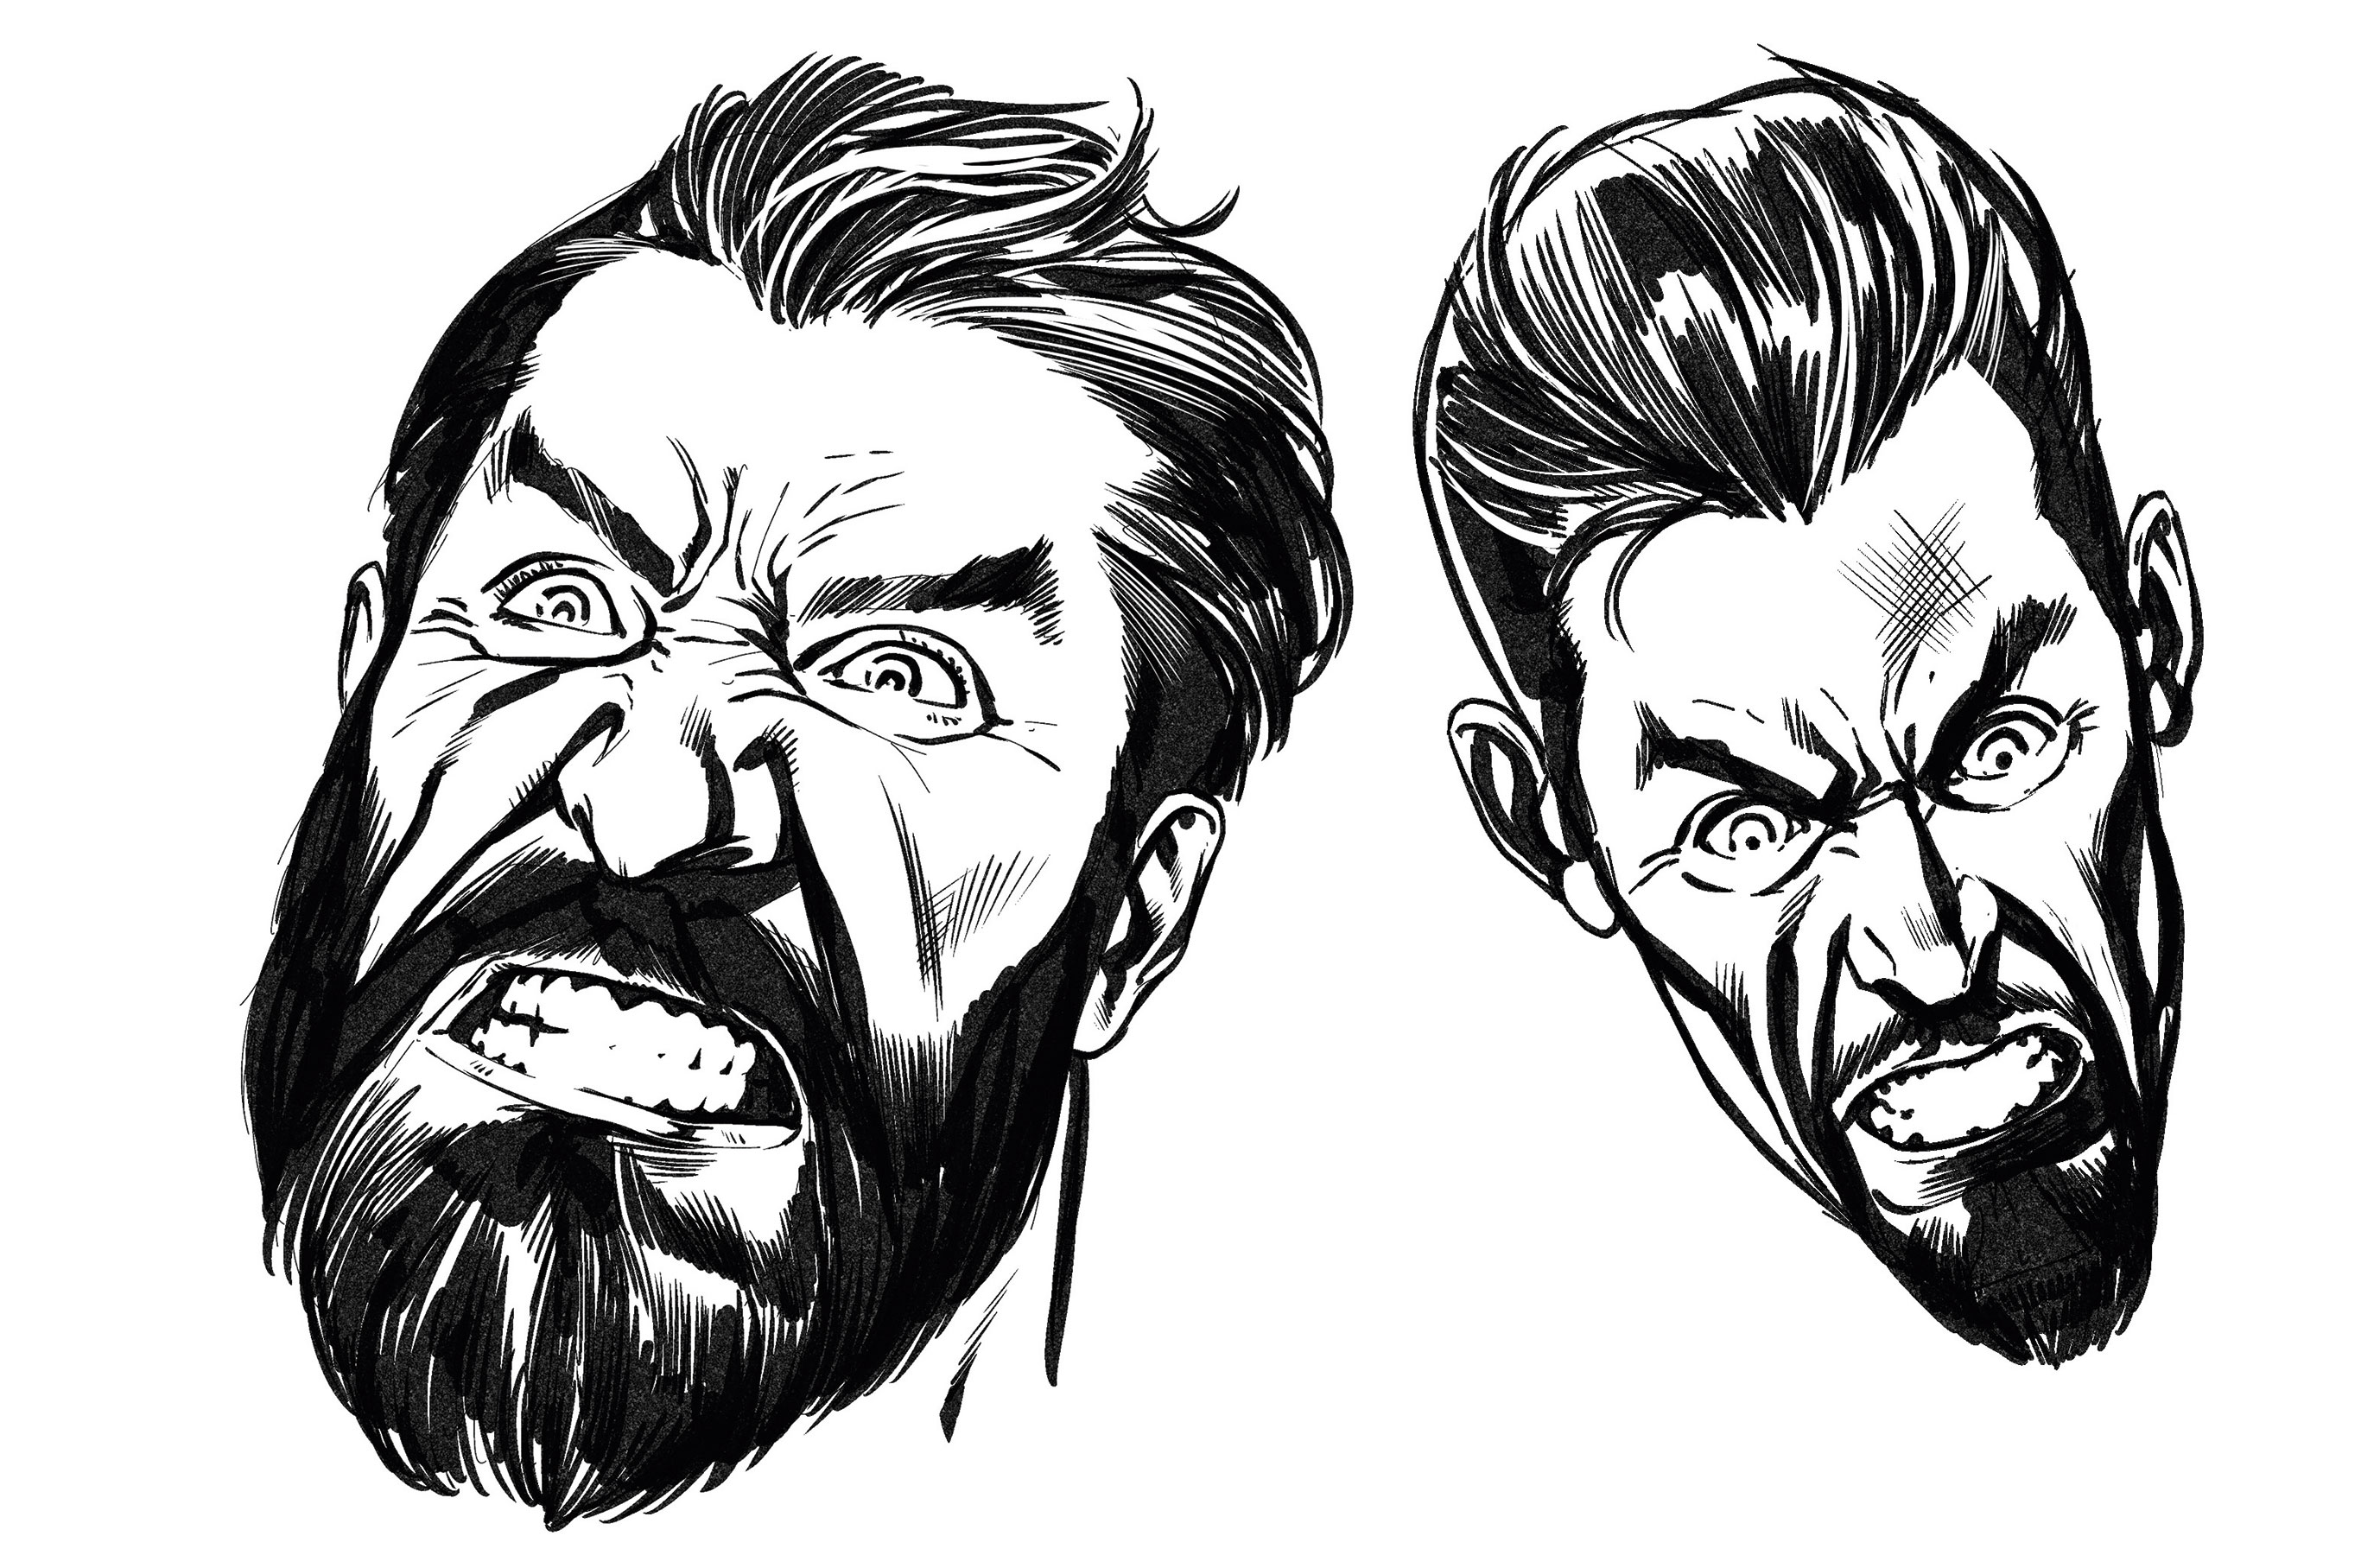
Make your characters over-act
Once you’ve got the basics it’s time to have some fun with your figures! As a general rule, try to construct the character over-act, to really convey the feeling in your attract. I generally start with a super-quick gesture illustration to capture the excitement I’m after. Look in the mirror and exaggerate your facial aspects. Try to set feeling into the drawing.

Try out different express in a mirror
When drawing attributes, try to get into their mindset: how they’re sensation and where they’re coming from emotionally. Then act out the formulation, applying a reflect or photo reference to capture the feeling. Ever try to get that perfect snapshot moment, and make it look as dynamic as possible.
Remember to consider the character’s age when adding facial lines
Adding facial cables to attributes can emphasise an expres, but it’s important to bear in mind the age of the person. The more character paths and feeling lines you illustrate on a face, the older a persona will look. Men generally have harsher pipelines and females have fewer. Younger personas will have also have fewer pipelines around the eyes, forehead and mouth disease. This is a good excuse to put together a citation library of faces young and old.
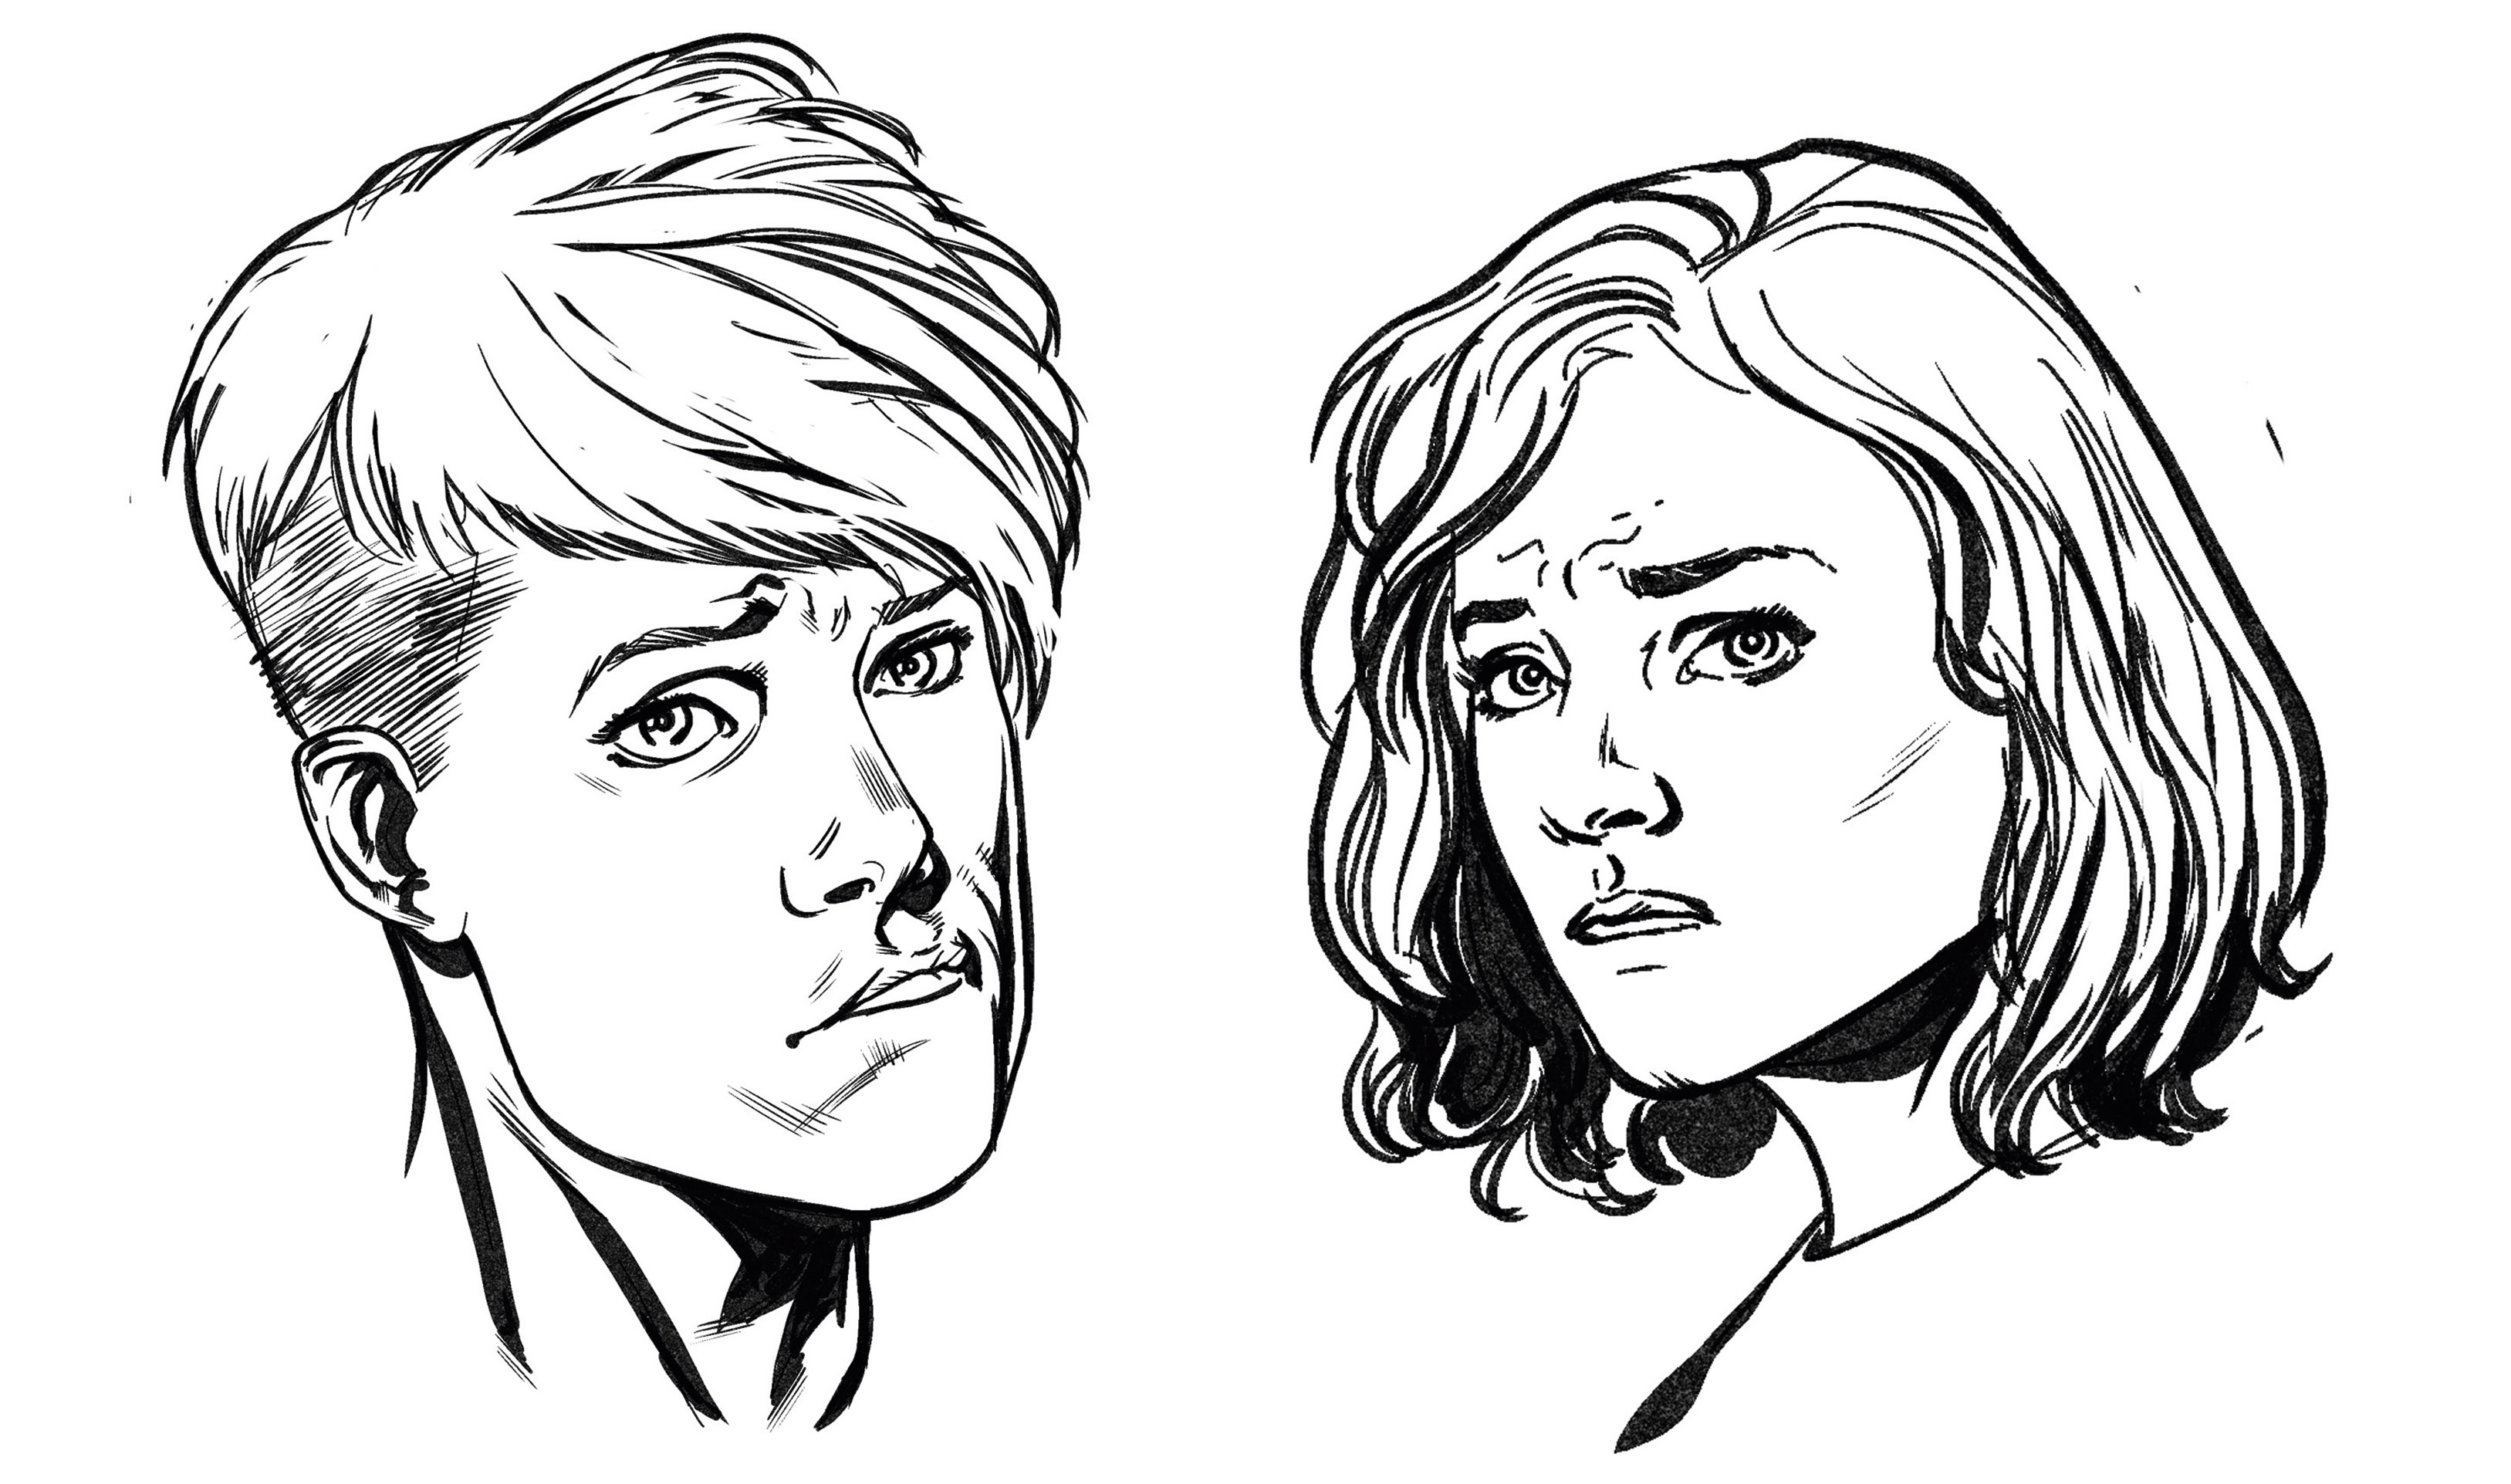
A creased eyebrow can instantly make a character look anxious
Sometimes, though, intricacy is required. A slightly raised eyebrow or grin can be very effective. Adding simply a touch of feeling or quirkiness to the character can stir them feel natural and lifelike.
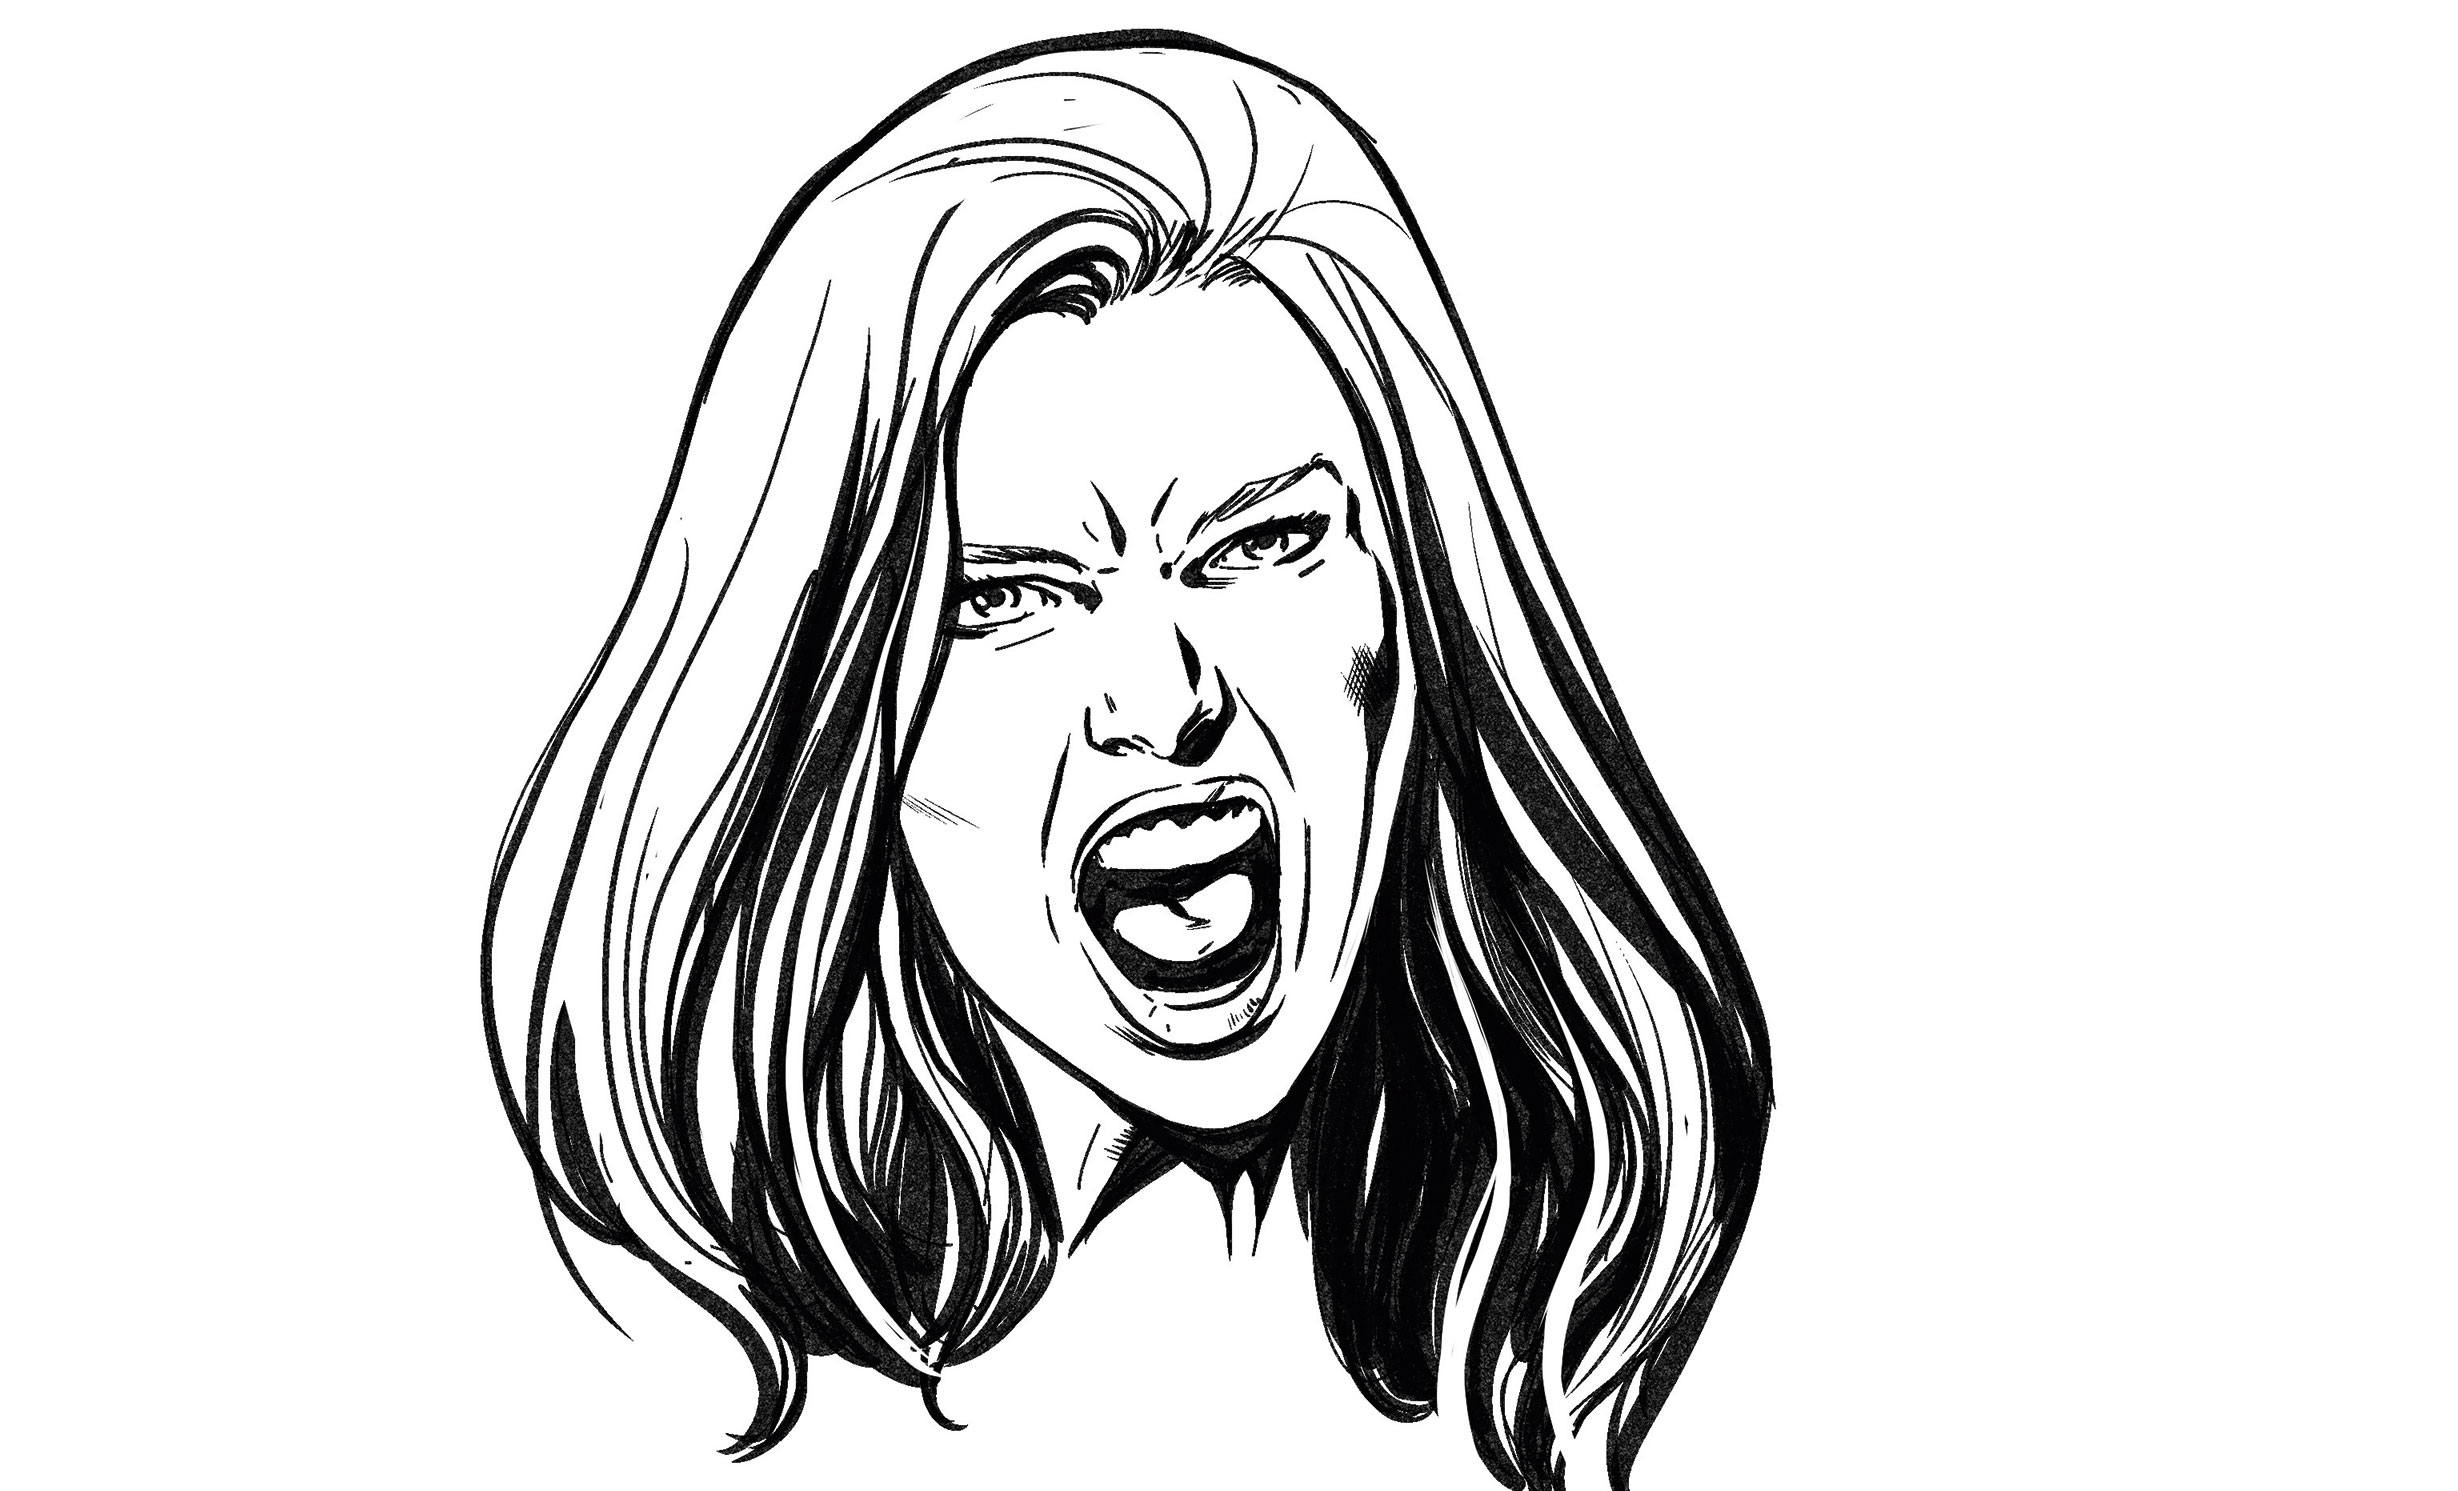
14. Try brand-new facial expressions

Push the boundaries with your characters’ expressions
Grab every opportunity to experiment with the formulations. Try to push what you’re used to drawing, and look at yourself in the mirror is how the face can move. Try and be whacky with the differences between facial expressions, but be careful not to hold your breather for too long!
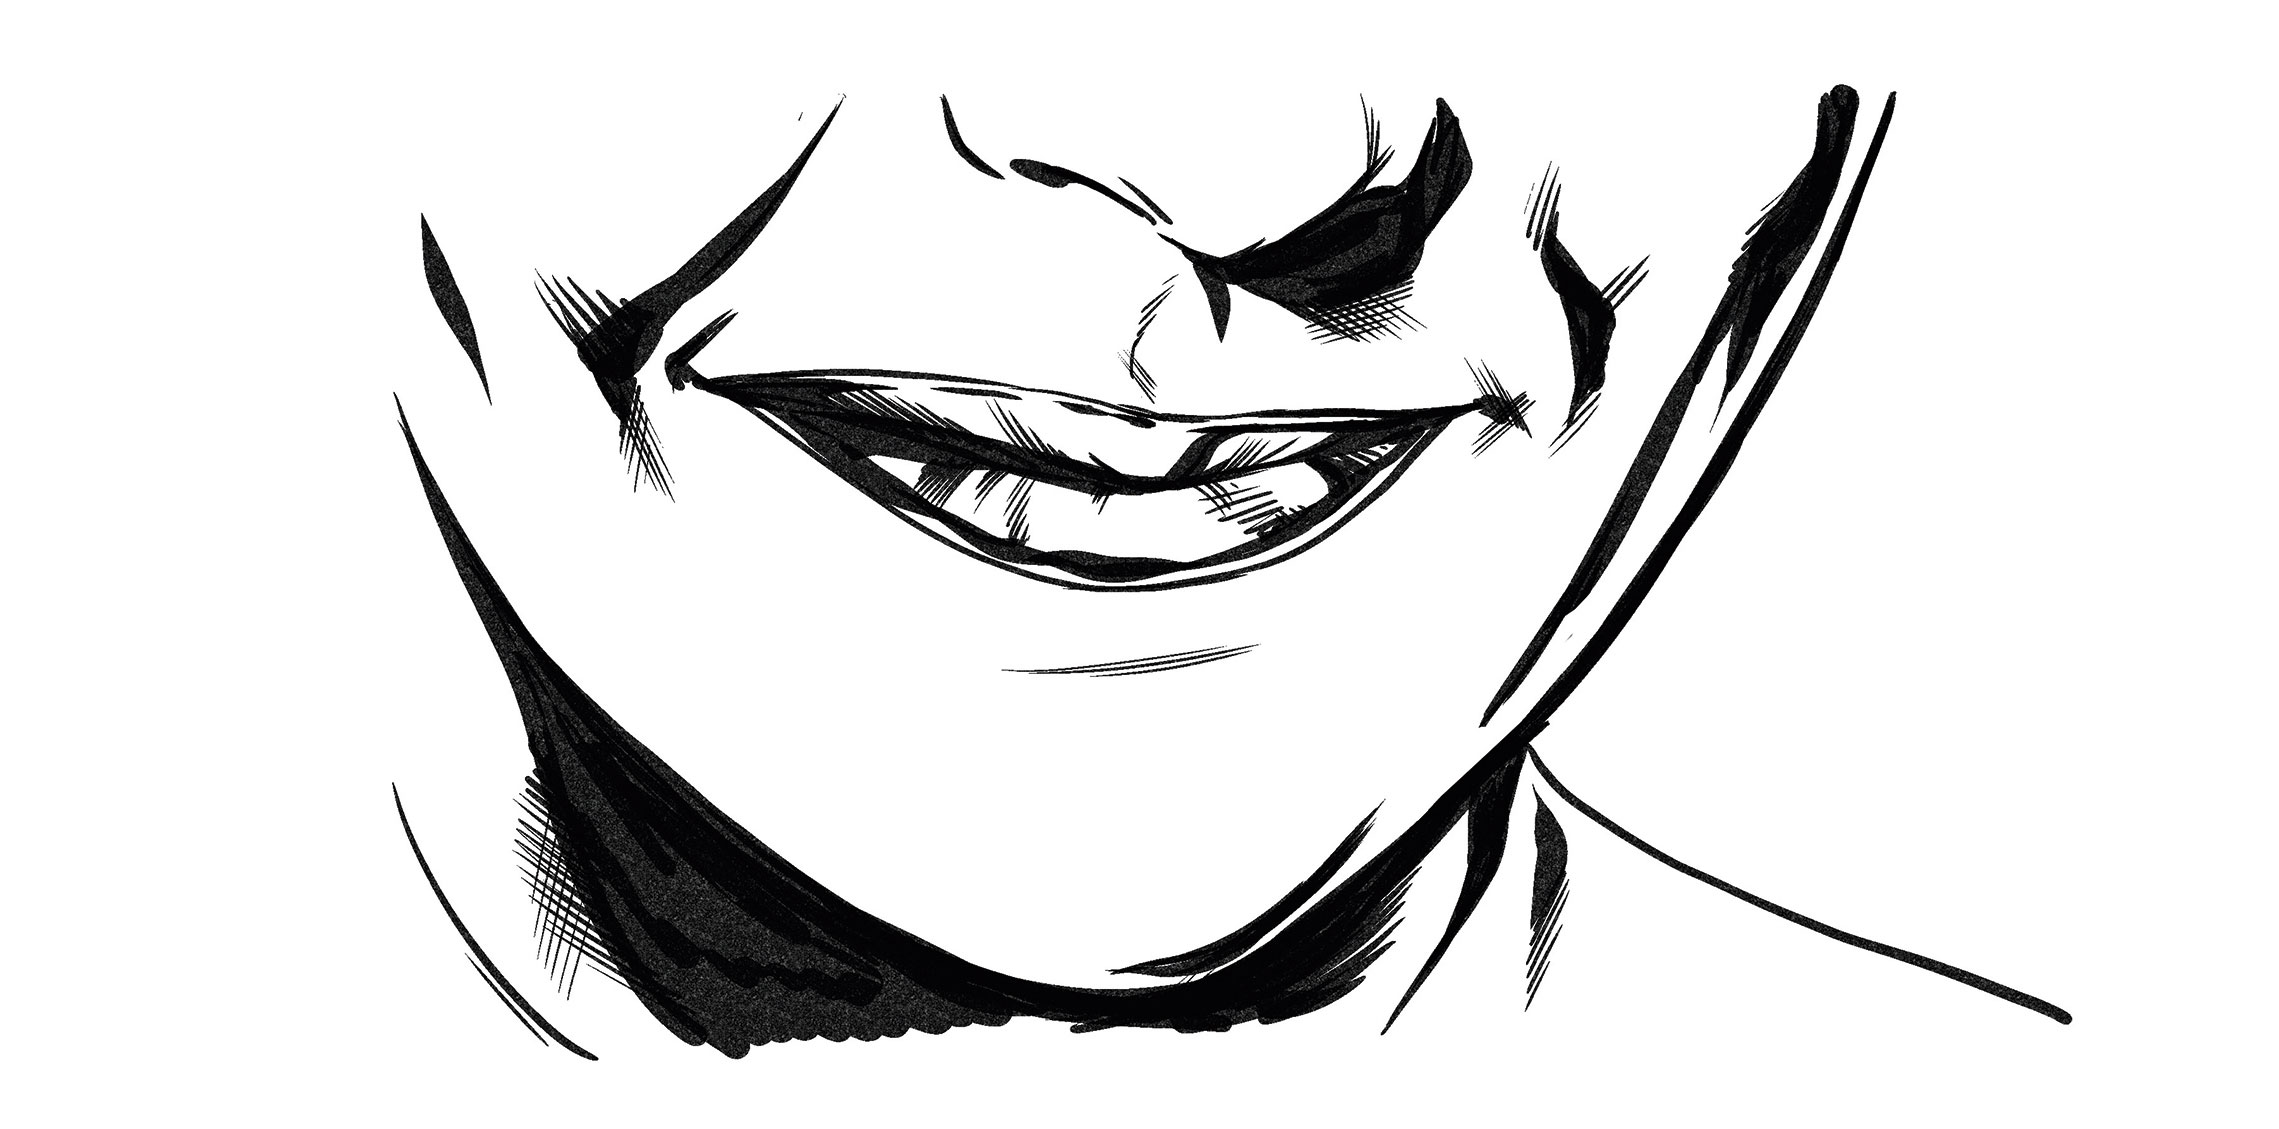
You don’t need to show the whole face to convey emotion
Both the eyes and mouth are expressive. A powerful technique when gleaning a comic page is to use a close-up of one of them. Consider illustrating an open mouth, snarling teeth or stern lips. Using only one area of the face will really push you to convey the excitement and sell the drawing.
It can help to draw outside the panel
While drawing brains you likewise have to think of the figure’s body language, which will show in the close-up. A tilt of the head or shrug of the shoulders can emphasise an feeling. I outline beyond the panel to check that the body language is working and is anatomically correct. Remember to have fun and try out new things!
This article was originally published in ImagineFX, the nations of the world& apos; s best-selling magazine for digital artists. Buy issue 160 or subscribe.
Related articles 😛 TAGEND Best practice advice for capturing human anatomy20 best iPad art apps for painting and sketchingDrawing techniques: 7 fundamental principles of pencil drawing
Read more: creativebloq.com